Your old USB junk / Donations

Updated: 20 Sept 2013

The other day I found a couple of cheap 6-button mice for sale at a discount/outlet store. I bought two just for the fun of it. I then plugged one in to my test machine and wouldn't you know it, I found a bug.

As always, I like to continue to test my code and especially my knowledge and test with all the hardware I can get my hands on. Therefore, if you have any USB devices: mice, keyboards, thumb drives, hubs, anything; that you don't use anymore, I would greatly appreciate it if you would send it my way.

If you run across a yard sale with numorous items and wish to send them my way or maybe a URL on ebay/amazon/another web site of someone selling their used/unwanted USB devices for cheap, please let me know.

If your contribution helps the cause, I will be sure and include your name in the next edition of my book, just as I have with the previous contributors.

You can send them to:

Ben Lunt
321 Pinedale Rd, Box 875
Taylor AZ 85939-0875
USA

If you found this site to be helpful, interesting, or simply just wish to contribute or donate, I don't accept true monetary donations. However, if you wish to donate, you can purchase one or more of my books. In a roundabout way, you are donating to the cause and you get something in return. If you have a pre-teen aged young one that likes camping, you might like another one of my books as well.

Thank you.

Sectors Across a Serial Line

hackaday Featured on hackaday.com

Going along with the Lunchbox post below, I wanted to preserve the contents of the hard drive. If it was a modern machine, I could have simply written a simple app (not counting the many I could have downloaded) to read each sector of the disk and save it to a USB thumb drive. Easy, right?

Well, this isn't a modern machine and no USB. With this in mind, if I read each sector and try to save it to the disk, the disk itself will fill up fast, let alone write to sectors I have already read. It doesn't have another HDC slot either, so no Slave drive...Where do I send the sector data?

I got out my Serial Port notes and wrote a small/quick app to send these sectors across a serial line to another computer with a hard drive large enough to hold the disk image.

Have a look at my git page for the code.

For the receiver, I used a standard x86 desktop machine running Windows XP (with a DOS session), with the following command line:

    mcopyata /r /c 1

For the sender, you guessed it, it is the Lunchbox described on a previous post. I used the following command line:

    mcopyata /s /x 0 /l 205360 /d 0x80 /c 2 /M

This code is designed to read up to 127 sectors at a time (though reading whole tracks only), sending the data across the line. It sends and receives 32-byte packets for services such as: "Okay, I'm ready", "Okay, I will send a buffer of 'count' sectors", "Okay, I received it, send the next", etc.

It needs work. For example, I don't check for timeouts (the machine will wait for a character indefinitely), as well as other errors. I only needed it to copy the whole drive. Once I did that, the task was over. No need to make it any more robust.

If you use this code, you might need to slow down the baud-rate, transfer a sector at a time (the /m command parameter), and/or modify the code a little to get it to work for your particular situation.

I would like to know if you do use it and how it worked.

My Museum Items

I decided to clear out some of my storage and got to some older computers I have. Here is a list with pics. (Click on the thumbnail to see in full size):

telsaralpha.jpg Telsa Alpha (1977)
I have not hooked this one up to see if it works.

atari400.jpg An Atari 400 (1979)
I have not hooked this one up to see if it works. I don't have any cartriages for it either.

ti_99-4A.jpg Texas Instruments 99-4A (1979)
I have not hooked this one up to see if it works. It has one cartraige.

atari810drive.jpg An Atari 810 Disk Drive
I have not hooked this one up to see if it works.

atari1200xl.jpg An Atari 1200 XL (1982)
I have not hooked this one up to see if it works.

laser128.jpg Laser 128 (1984)
I have not hooked this one up to see if it works.

tandy64kcc2.jpg Tandy 64k Color Computer 2 (1983)
I have not hooked this one up to see if it works.

tandy1000tl.jpg Tandy 1000 TL (1984)
This was one of my first computers. At the time I boxed it up, it worked. That is the original mouse, keyboard, and box.

tandy100pcex.jpg Tandy 1000 EX (1984)
I have not hooked this one up to see if it works.

tellagames.jpg Sears? Atari 2600 Tele-Games (1982?)
I have not hooked this one up to see if it works.

videocompsys.jpg Atari 2600 Style (1982?)
I have not hooked this one up to see if it works.


And finally, my favorite...

commodore64.jpg Commodore 64 (1982)
This one was still in the original box. Unfortunetly, the box was a bit water damaged, but the commodore itself has never been out of the box until today. I cut the original tape to open the box. Now, before you have a heart-attach for me cutting the tape, the box nearly fell apart as it was. The machine has yet to be plugged in. It is in its original packing along with its original cables and power supply. commodore64_cables.jpg
On top of the orignial box is a drive for this Commodore 64.

This Commodore 64 is in great condition, no dust, no damage at all. Remember, I have yet to plug it in...

Click the image below to see a full 2576 x 1932 resolution image of this machine:
commodore64lg.jpg
It is missing the sticker on the top left, but I think that it is actually in the paperwork stuck to the bottom of the box, yet to be stuck to the machine.

This is definately a keeper...

Old 80486 Lunchbox

In my years being a programming consultant, I have worked on many projects, one of them being my favorite. A gentleman from the other side of the country called me up and said that he had weather stations around the area (about 17 or so) giving the current time and temperature along with forecasts for the next few hours.

These simple stations consisted of a single standard desktop PC computer using an ISA card to communicate with a temperature probe and a modem to call a national weather station for the forecast.

The caller would call a specified number, which would connect to this PC via a modem. The modem, along with other hardware and software, would send back text in the form of voice, giving the current time, temperature, and forecast.

The catch was that the caller would have to listen to about a 30-second advertisement before the time, temperature, and forecast would be played. At call time, the software would randomly choose one of a few pre-recorded advertisements. The owner of the "station" could change these advertisements at will.

The owner of the PC, hardware, and software, who became a good friend of mine over the years, would make a small amount of money through these "stations" surrounding the area.

However, the owner didn't want to drive to each "station" each time there was something wrong with the PC. Therefore he and I devised a way to call the "station" as if we were a local caller, but enter VOICE codes that would put the software into command mode allowing us to get status of and/or change functions of the "station".

To program and debug the software, I needed to have at least two PCs along with a Ringit Simulator in between each one, connected via two modems. This way I could call one PC from the other as if I were using the actual phone company, with each PC in the same room.


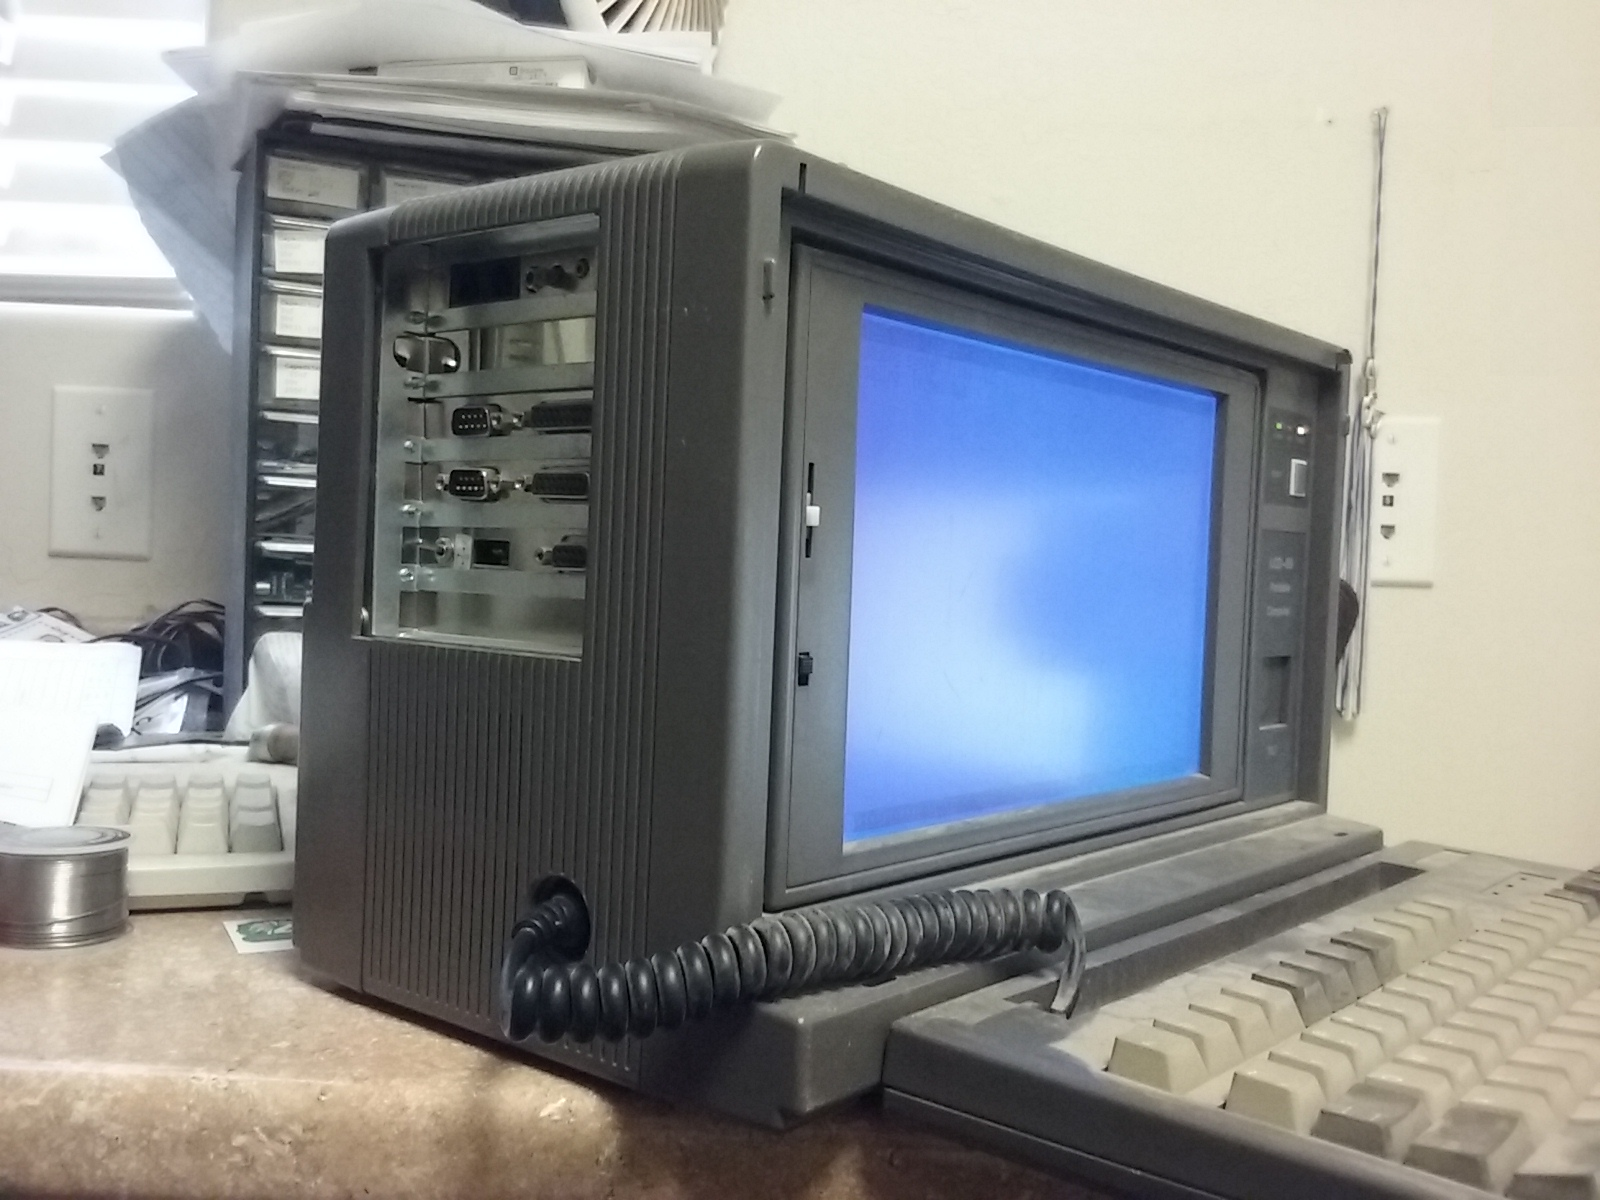
At the time, the owner sent me a small PC so that I could use it as the test PC, or the "station". He called it a "Lunch-box" PC. When it arrived, I found out why. Click on the image to see it full size. It is about 16" wide, 9" in height, and 9" in depth.

lunchbox_side_sm.png

The owner, who still operates some of the function of the project, has a website that uses a national code base and weather gathering system. However, the 17+ stations have all but been retired since my good friend has now retired himself, and spends most of his time in service to his church and his grandkids. (An honorable new career, me being religious and having three grandkids of my own.)


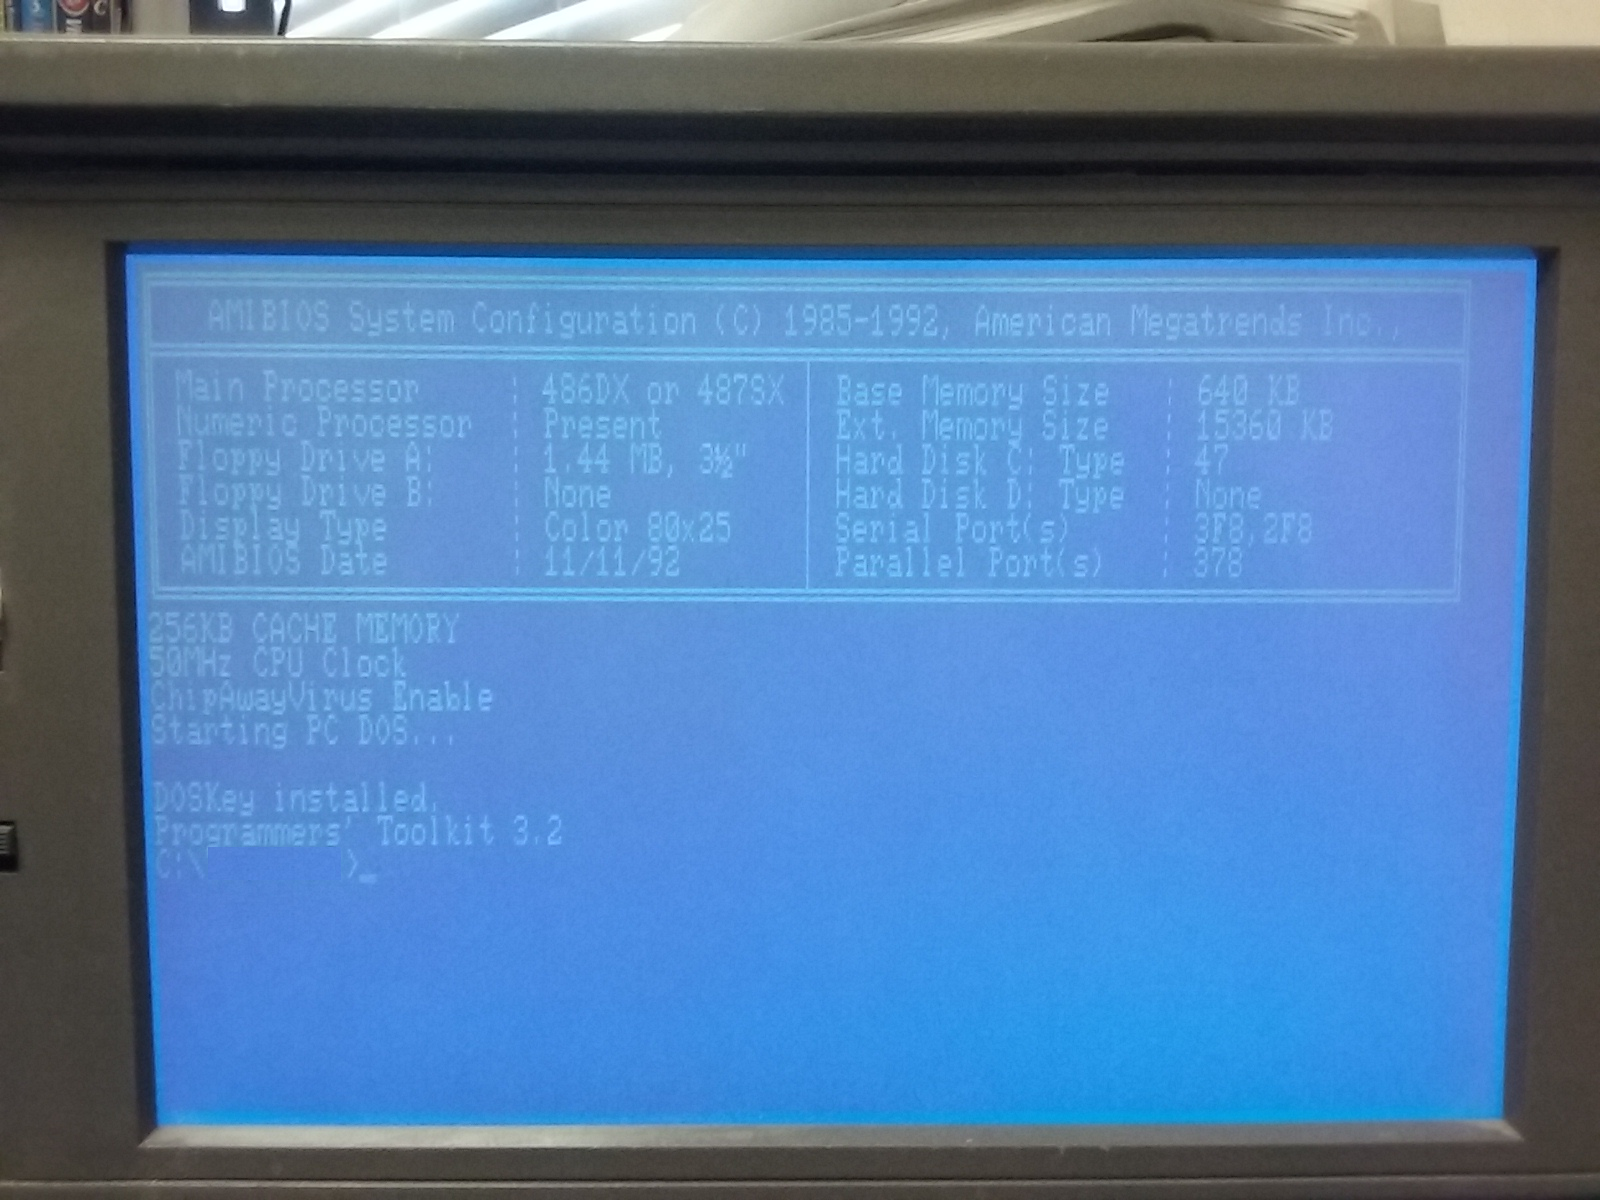
The other day I decided to get this old "Lunch-box" out of storage and see what it was made of. Below is an image of the boot screen. Click on the image to see it full-sized. (I blurred out the prompt due to software name copyrights.)

lunchbox_boot_sm.png

You can see that it is a 80486 with 16Meg of RAM, nearly a 100Meg of hard drive space, a 1.44Meg floppy, and an 80x25 color display. Looking at the first image above, you can see that there are two serial ports installed, a video card, as well as the modem.

I decided to see if I could get my Hobby OS to boot on it, well knowing it wouldn't get too far, but I still wanted to see. The first attempt completely failed and halted the machine just after the POST.

After a little bit of debugging, this machine does not have the CPUID instruction, which I thought I clearly scanned for throughout the first part of my code. Come to find out, I used the CPUID instruction as a serialization instruction after using self-modifying code to call the Real Mode BIOS from Unreal Mode. Therefore, I was using the chicken to see if it could lay an egg before the egg hatched and became the chicken I was checking.

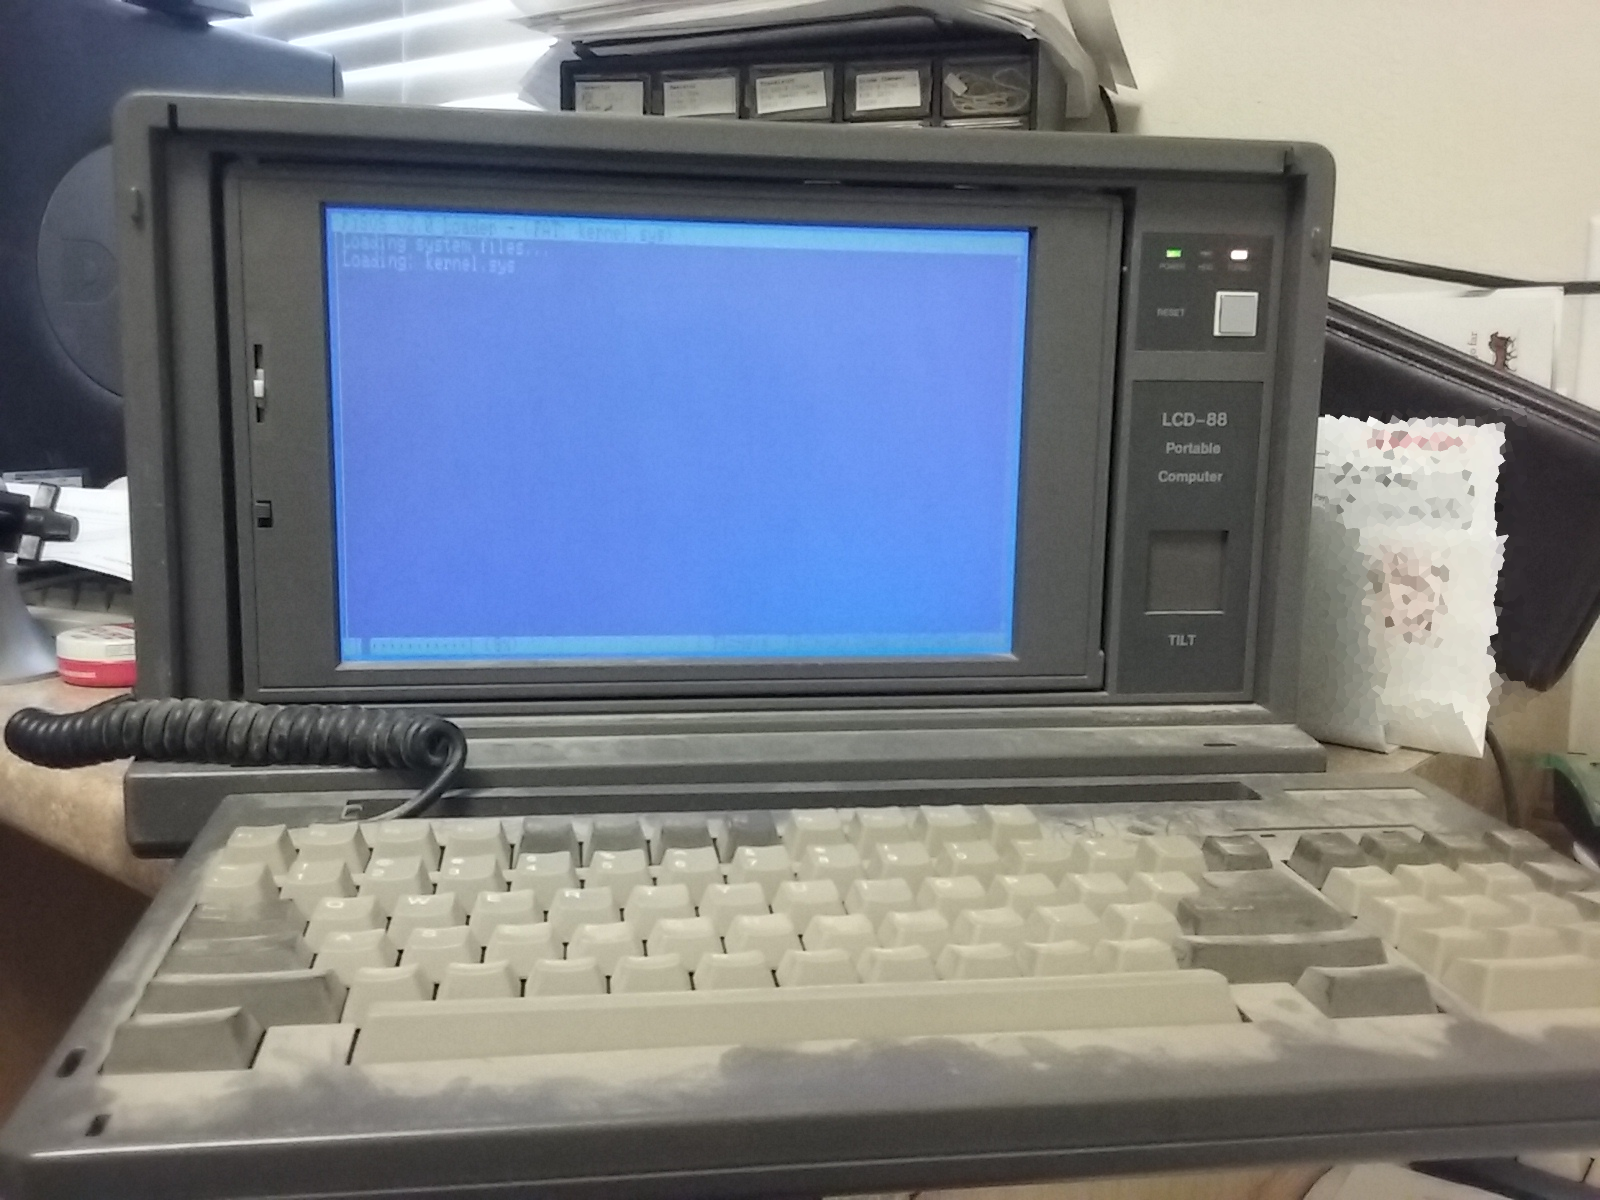
After a few other modifications, and a massive restraining order on the memory assumptions, I got my OS to boot and load my kernel. Here is an image of this happening.

lunchbox_fysos_sm.png

The screen is a little fuzzy due to the camera I used to take the image. The keyboard looks like it has a lot of dust on it, which is really the case. I just need to charge my air compressor to 15 pounds or so and give it a good blast. (Sorry for the pixelated envelopes to the right. No one needs to see my mail, right?)


Once the kernel is loaded and ready for execution, the "Lunch-box" does a triple fault and reboots due to the kernel requiring more memory than the 16Meg this little machine has. However, it did what I desired it to do, boot and load my operating system.

This was a fun little project. I found a few bugs and code errors that I probably would never have found without actually running it on an older processor. It was an enjoyable task, and this is exactly why we do this, right.


To see updated boot and loader code that works on this 80486 as well as modern hardware, have a look at my github page. I didn't have to update the boot code at all for this 80486, but the loader code, in the loader folder, had a few modifications. The EFI folder is for a more modern machine using UEFI firmware instead of the Legacy BIOS.

Updated code for Boot and Loader (Again)

I have updated the code for my boot and loader system. You can get the latest at https://github.com/fysnet/FYSOS

It now includes the UEFI version bootable on a UEFI Firmware machine.

Thank you all for your support. It is very much appreciated.

Ben

Updated code for Boot and Loader

I have updated the code for my boot and loader system. You can get the latest at https://github.com/fysnet/FYSOS

Thank you all for your support. It is very much appreciated.

Ben