Ultimate: The Ultimate Image Browser: Make New EFI GPT Image
The following instructions will help you make a EFI GPT image recognized by Windows 10.
To make a new GPT image, use the File->New menu option, select a file or enter a filename and click on "Save". If this is an existing file, you will need to confirm to overwrite it.
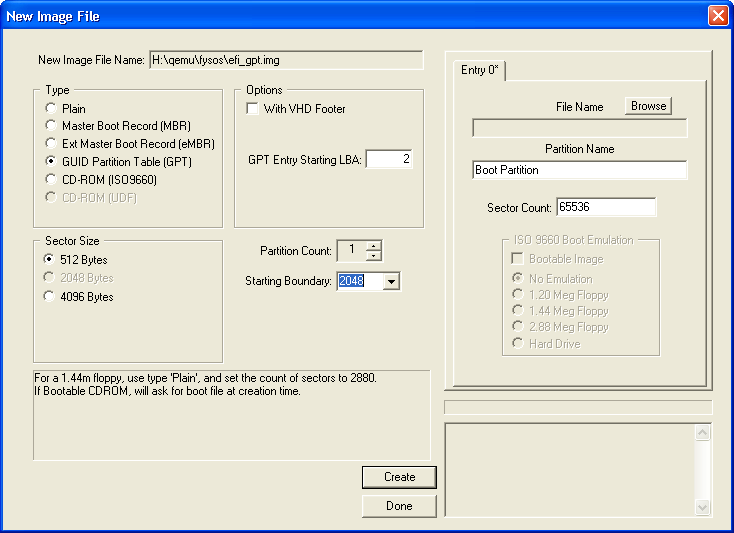
Choose the GUID Partition Table type.
Partition Count: Using the arrow buttons, add or remove partition entries in the Tab Control to the right. For this example, I chose '1'.
Boundary: You can use a Partition boundary, where the first partition will start, etc. I chose 2048 but you can type any amount.
Partitions: If you have a file image you wish to use for that partition's volume, click on the "Browse" button for that partition entry and enter the file name and path. You can also drag and drop a file to anywhere on this dialog and it will add it to the currently selected Tab. For this example, I will leave them blank sectors.
Name: Type in a name for this partition.
Sector Count: If you entered a volume file for this partition, the sector count will be updated to this file's size. If you want a blank partition, enter the count of sectors you wish to use for this partition. For this example, I used 65536.
Once you have entered the information in each partition you wish to have, click on the "Create" button. If there are no errors, the utility will indicate a successful creation. Click on the "Done" button. The utility will then ask you if you wish to "Open" the file.
You should now show a PMBR, GPT, and Unknown Tab.

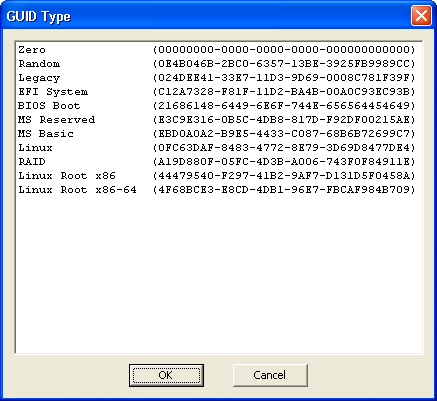
Click on the GUID Type button in the 'Entry 0' Tab. Choose the 'MS Basic' GUID Type.
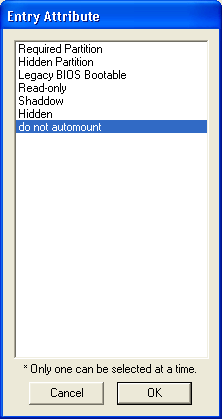
Click on the Attribute button in the 'Entry 0' Tab. Make sure only "do not automount" is highlighted and click OK.
Now back to the GPT Tab.
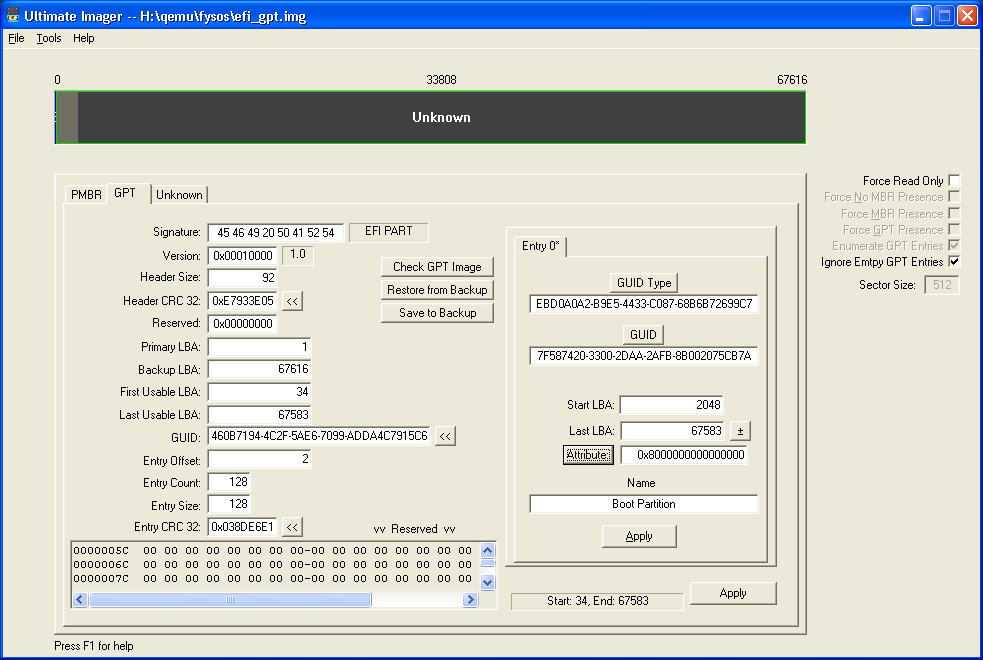
Click on the Entry Tabs 'Apply' button, just under where it shows "Boot Partition".
Click on the '<<' button to the right of 'Entry CRC 32:'. This will update the Entry Partition's CRC value. It will also ask you to update the Header CRC value. Click Yes to accept.
Now click on the App's Apply button in the lower right corner.
Now click on the "Save to Backup" button to update the Backup GPT and Entries. Click on 'Yes' to accept.
Now click on the Unknown Tab to move to the partition.
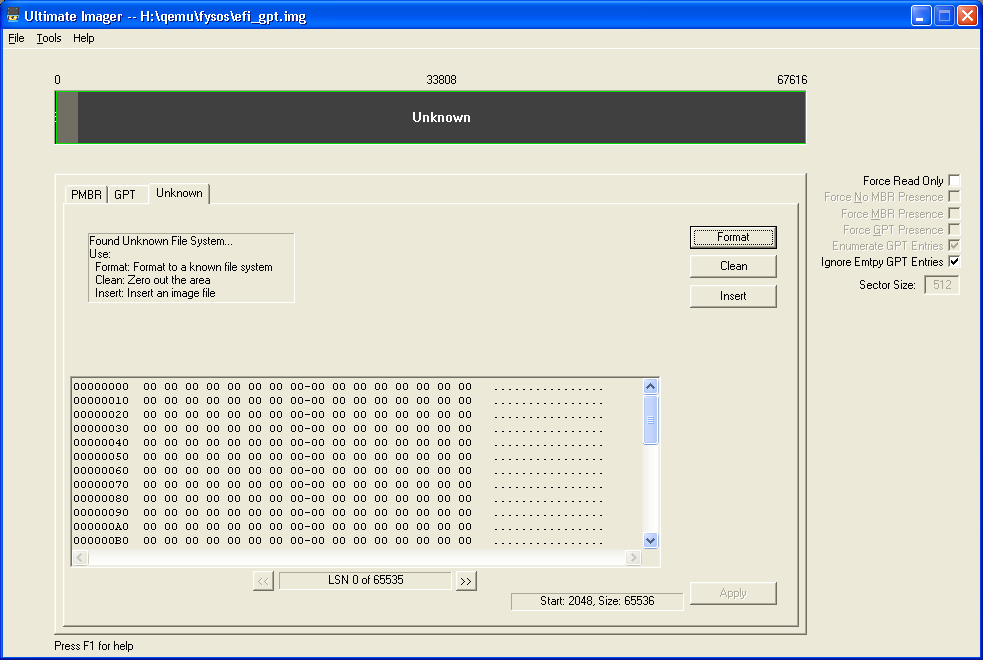
Click on the Format Button to Format the partition.
For this example, I will choose FAT 16. Contrary to what people might think, a valid EFI Partition can be any file system you wish. It does not have to be FAT 32 formatted partition.
A window will appear asking for a FAT Boot Sector File. This is the ready-made boot sector you wish to use. For this example, I am going to ignore the boot code and click on Cancel.
Another window will appear asking for a few parameters.
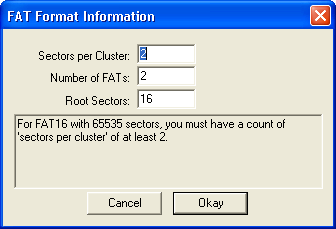
For this example of 65536 sectors, the defaults are acceptable. Click on Okay.
The utility will tell you that a Minimal Format is complete. Click OK.
You need to reload the image. Click the File menu item and then Reload.
Click on the 'Fat 16' Tab, and the new Partition should now be shown.
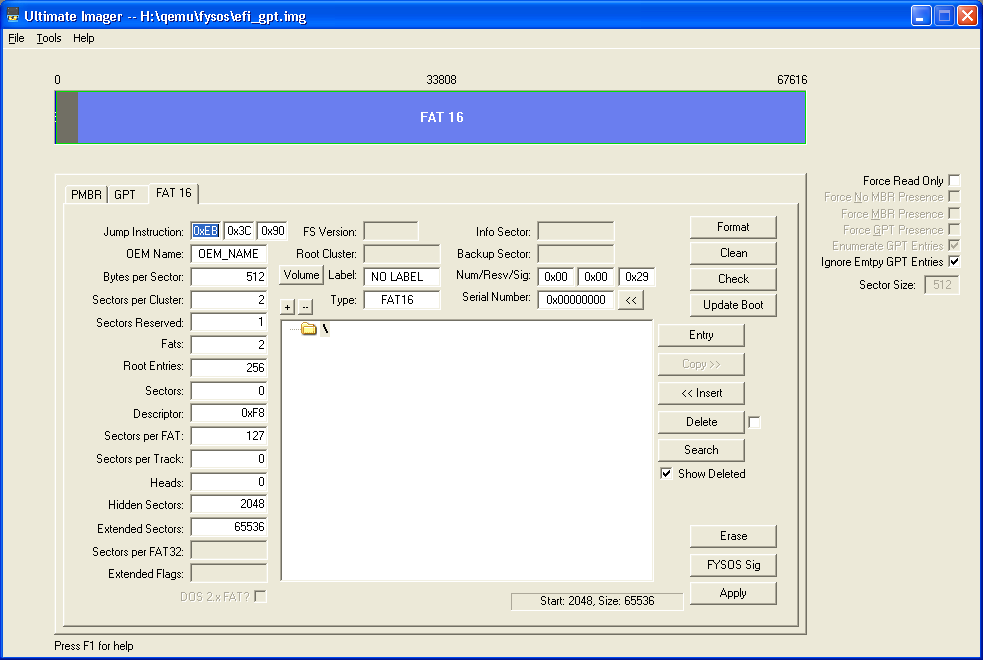
You now have a EFI GPT image file ready to be written to a USB Thumb drive. The image, once written to the Thumb Drive and inserted into a Windows 10 machine, should be recognized as a GPT device and accessible as a FAT 16 Volume.
However, before you do, you might wish to update the Serial Number of this partition by clicking on the '<<' button to the right of Serial Number: 0x00000000. You might also want to put in an OEM Name and a Volume Label. Be sure to click on the 'Apply' button to apply the changes. (No need to update the FAT's).